TAR SNAKES

tar-snake-banner

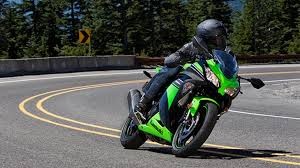
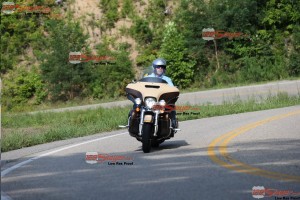
tar-snake-in-curve

This might be a repeat for some members but we have allot of new members now and I posted this in our old website a few years ago. I bring this up while reading a new members blog last month. So here you guys go.

TAR SNAKES

You’ve seen tar snakes out on the road countless times, but probably never paid too much attention to them in your car. But when riding your motorcycle, it’s a whole different story. With only two tiny patches of rubber keeping you upright on a bike, you have to be a lot more wary about road surface imperfections, and tar snakes are among the most sinister ones you’ll find.

What are Tar Snakes?

As roads age, they develop cracks in the surface. As the road gets abused and traffic and weather take their toll, those cracks get bigger and bigger, and cause the road surface to degrade quickly. As a temporary fix, road crews will fill the cracks with sealant – usually a soft, tar-based substance – to fill the cracks and keep them from expanding. The result? A road covered in random, windy black lines that resemble snakes; hence the term, “tar snakes.”

Why Are Tar Snakes a Hazard to Motorcyclists?

Asphalt sealer, or tar snakes, are hazardous to riders because they can compromise your traction in three ways:

  • They have a very different texture than asphalt, and your tires will respond differently to them than to the road
  • They create a bumpy road surface that can unsettle your suspension
  • They can become softer or slicker in hot weather, or when wet

Tar snakes are generally a lot softer than asphalt, so they can easily get foreign objects embedded into them and they can even come dislodged and stick to your tires! Again, none of this would be an issue in a four-wheeled vehicle (which is why they are used), but on a motorcycle, they pose a unique hazard.

What Will Happen If You Hit A Tar Snake?

If you’ve ever ridden over painted lines in the roadway, you may have noticed a change in traction from your tires; this is because paint lines tend to be more slippery than asphalt, and should be avoided.

Tar snakes are similar, but a lot more tricky; because unlike paint lines, you never know where they will be! They are applied on the road wherever damage occurs, so you can hit a patch of them very unexpectedly, and some of these patches can be pretty nasty.

Most of the time, when you ride over tar snakes, you won’t notice much more than a bumpy road. The trouble starts when you’re leaned over; hitting a tar snake can cause you to lose traction momentarily, causing your bike to slide.

Often, you’ll regain traction quickly and won’t experience more than a “puckering moment,” but in a worst-case scenario, you can go down. This has happened to many riders – even motorcycle cops in several cases across the country.

So what do you do when you encounter these dangerous snakes?

How to Handle Tar Snakes on your Motorcycle

Remember, tar snakes are only applied to roads that are damaged, so you’re already riding on a road surface that’s less than ideal. The tar snakes on the road make the surface better for most vehicles, but worse for us riders, so you have to be doubly cautious when riding over them. Here are a few steps you can take to deal with them:

Always scan the road surface while riding to look for them.
  • Mentally, approach the tar snakes as you would any obstacle
    • Be aware of the danger yet remain flexible mentally; be open to new possibilities
    • Accept that the motorcycle may move around beneath you and that traction is less than perfect
    • Visualize a positive outcome
  • Physically, approach the tar snakes as you would any obstacle
    • Reduce speed
    • Approach the tar snakes at 90 degrees where possible, no less than 45 degrees preferably
    • Remain loose on the motorcycle; tightening up or establishing a “death grip” on the motorcycle will only create issues
    • Operate the throttle or brakes in a gradual, slow, and precise fashion
Also, remember that tar snakes respond to changes in weather very differently than normal road surfaces do. In hot weather they can “melt” and become more soft and sticky, and when wet, they can be a lot slicker than asphalt.

Overall, tar snakes are hazardous to motorcycles because they are simply not designed with us riders in mind. Transportation departments and road crews slap them all over aging roads across the country because they are perfectly acceptable road repairs for those in four-wheeled vehicles – the handful of us that ride on two.Just know to look out for them, be prepared, and keep the rubber side down…where it belongs!
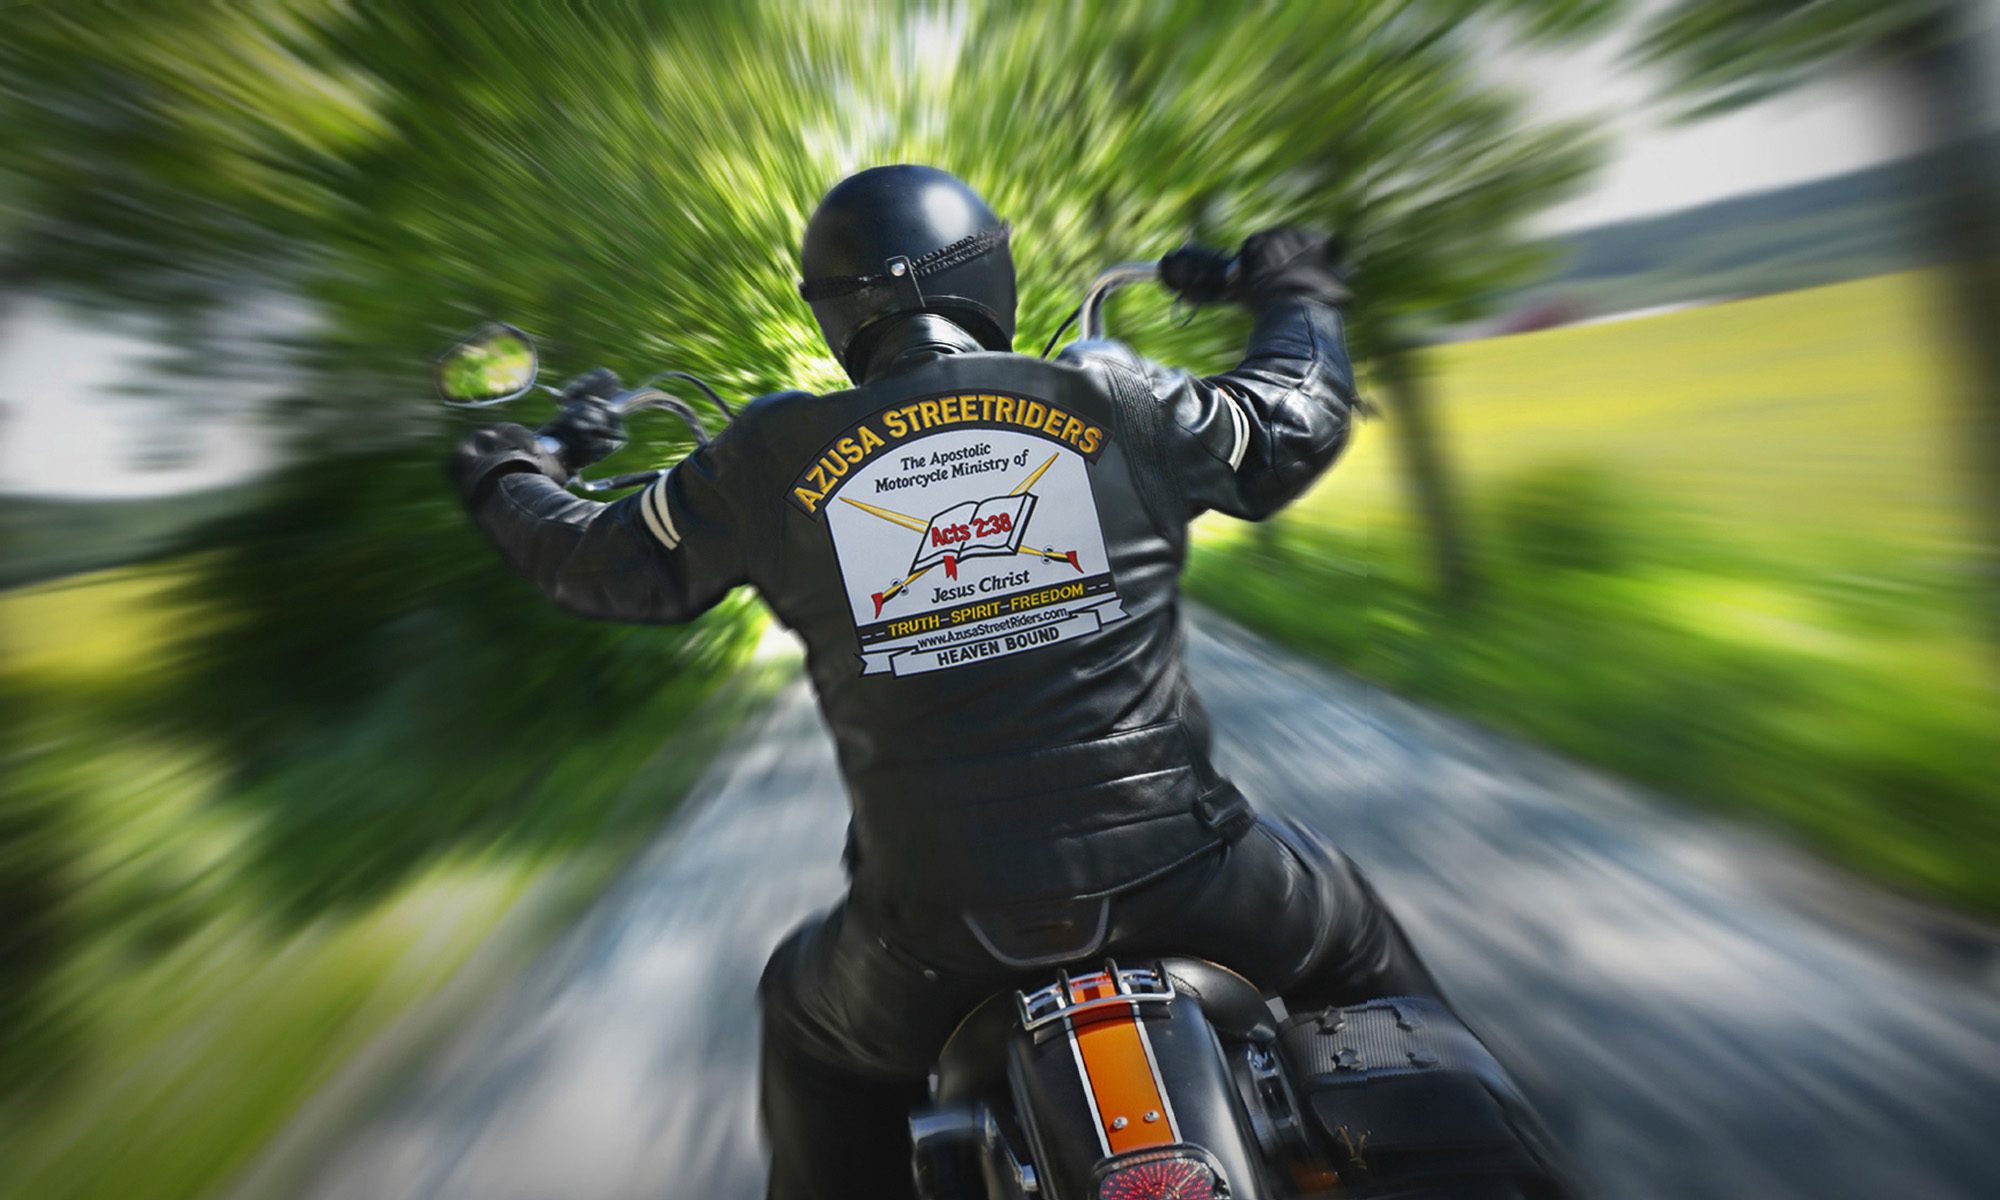
Michael Theodore
National Road Captain

What’s Mine is Yours Safely riding unmarked back roads

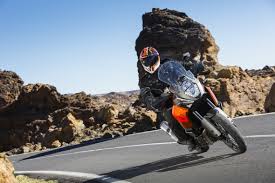
back country road

What’s Mine is Yours Safely riding unmarked back roads
IF YOUR LIKE ME, your favorite roads are the lesser-known gems that wind through the back country,  away from traffic and civilization. While those wonderful rural roads can offer up a relaxing ride, they can also present their own set of threats, especially the “lane-and-a-half” variety with no lane markings. On these stretches, “sharing the road” can suddenly mean sharing the same space. Quiet back roads are attractive because we expect them to have little or no traffic. But keep in mind that local drivers have that same expectation. Driving these roads daily, they rarely encounter other vehicles on a typical drive. As a result, they’re often inclined to use more of the road, especially on curves .Without a painted line to define lanes, what’s ours is often claimed as theirs, creating a no man’s land in the middle portion of an already narrow roadway.
The typical cornering strategy calls us to establish an outside line to improve the view around a bend. But an unmarked, narrow back road with limited sight distance calls for a compromise. Think of your lane as less than your half of the pavement. For a right hand bend, establish a position that doesn’t extend wider then the middle of your lane in anticipation of an on coming vehicle partly on your side of the road. Why not just move toward the inside of the lane? Because vehicles tend to drop wheels off the inside edge, kicking dirt, gravel and other debris onto the adjacent road surface. For a left hand bend, position yourself toward the outside of the curve, just in case that wide tractor or truck with a trailer appears suddenly and is taking a wide approach that includes part of your lane. Just Remember, when riding the back country roads. When there are no road markings, what’s mine is your, And theirs.
Keep it safe enjoy your ride
Michael Theodore
National Road Captain

The Dirt on Riding Un Paved Roads.

off road

The Dirt on Riding Un paved Roads.
dirt road
IT’S THE END OF THE ROAD for many. But it’s just the beginning for those who are comfortable and confident when the pavement ends and gravel or hard packed dirt begins. Why is it we get so uptight when things get loose underfoot (or under tire, as it were)? Because things feel a little weird and unfamiliar on dirt. The motorcycle moves around more beneath us on unpaved surfaces, the front wheel seems to wander and the handlebars come alive in our sweaty palms. In reality, while things feel loose, there is typically more traction on hard packed dirt than riders expect. All of that movement the machine is doing? It’s just the bike’s natural way of finding a suitable path forward. That said, there are a few techniques unique to riding unpaved roads vs a hard, smooth road surface.
Stay lose. Avoid fighting the bike’s surface and, instead loosen your grip and let the motorcycle find its way. Remember the bike doesn’t want to fall any more than you do; it wants to keep moving ahead and stay upright. Keep your eyes up, looking well ahead and the bike will follow. Shift your weight from your seat to your feet. With arches on the pegs (or boots flat on the floorboards) and knees against the tank, steer with your lower body and less with your hands. Unlike riding on pavement, you’ll want to keep your body upright, allowing the bike to lean beneath you in corners to maximize traction. While all of this may feel a bit awkward at first, you’ll soon become more comfortable and more confident as you discover just how well even a large touring motorcycle can navigate dry, unpaved surfaces. And the end of the pavement will be just the beginning of your next riding adventure.
Michael Theodore
National Road Captain

6 Riding Tips for Dealing With Tailgaters

Tailgaters

You can not change some drivers’ attitudes, but you can protect yourself. Here’s how.

Tailgaters are not nice. Even though these intruders can make the hair on the back of your neck rise, your main concern needs to be whether the tailgater can stop short of rear-ending you if you need to stop quickly. Trying to change a tailgater’s behavior is about as likely as convincing Donald Trump to endorse Bernie Sanders for president. Any attempts to do so will only distract you from other hazards and could trigger deadly road rage. Instead, I present to you a few tips for minimizing the risk of being the recipient of a Hood Ornament.
1. Check your speed. If people regularly tailgate you then maybe you are not maintaining the expected speed of surrounding traffic. While you should avoid riding faster than you are comfortable, riding too slowly could increase the risk of being tailgated if traffic is moving significantly faster than you are. If this is the case, you may need to find an alternative route where the pace is more to your liking.
2. Let them by. If it becomes apparent that the driver is not going to back off, then find a safe place to pull over. This is often easier said than done, but why let a tailgater ruin your ride if you can let them pass? Be sure to signal early and slow gradually. Then watch as they zoom by to tailgate the next vehicle ahead.
3. Increase your following distance. A common response to a tailgater is to speed up to try and get away from the tailgater’s bumper. But, this usually results in the tailgater also increasing speed. Instead, slow down. No, not to mess with the tailgater to get them mad, but to gain a space cushion ahead of you. This allows you (and the tailgater) ample time and space to slow if necessary. A minimum of 3 seconds should do the trick.
4. Communicate intentions early. Most motorcycle brake lights do not command a lot of visual attention. But you can increase its effectiveness by flashing it two or three times before actually reducing speed. Also, be sure to activate turn signals at least 4 seconds before slowing to give drivers behind you plenty of notice.
5. Use smart lane positioning. To prevent a close call from a tailgater it’s important to choose a lane position that allows you the best angle of view past the vehicle ahead so you can spot problems early and slow gradually. When stopping at a traffic light or stop sign, keep an eye on your mirrors and flash your brake light. Also, place yourself in the right or left-hand portion of your lane to give the driver behind an escape if he can not stop in time.
6. Stay cool. This may be the most crucial. Even though tailgaters can get under our skin, smart riders do not let this bad behavior affect their judgment. Instead, they initiate strategies that prevent these morons from decreasing safety and enjoyment.
Michael Theodore
National Road Captain

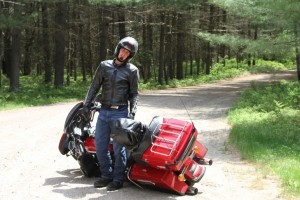
Touring Tip: Helping a Stranded Rider

Touring Tip: Helping a Stranded Rider

Feb-16-touring-tip-IMG_6596

In the earlier days of motorcycling, when bikes were less reliable, riders frequently became stranded by a mechanical malfunction. Back then, motorcyclists were often as handy with a wrench as they were with the throttle. If they couldn’t fix their own bike, other riders invariably stopped to help out. The bonds among fellow bikers were never stronger.

Today, we’re living in much different times. Modern motorcycles are less prone to breaking down. Crime is more prevalent. Many times a stopped bike along the roadside is due to something other than a mechanical malfunction. The rider may be taking a bio break in the bushes, extracting refreshments from the saddlebags, or some other plausible reason for stopping that doesn’t require assistance. It’s easier nowadays for other riders to rationalize not stopping to ask if help is needed.

In the event an actual mechanical problem is encountered, many, if not most, riders have roadside assistance and carry a cell phone to procure help. I recall an instance when a fellow member of ASR who shall remain nameless—simply ran out of gas. I’ve personally been surprised to find a nail in my rear tire on several occasions.And remember when the spring on my kickstand broke off. Or my headlights went out.So unexpected breakdowns still do happen out on the road!

But let’s suppose a single rider is stranded. How does a passing motorist know if the rider needs help? The universal signal for a car driver needing help is a raised hood. Last time I checked, motorcycles don’t have hoods. So, is there a universal SOS signal for motorcyclists seeking help from passersby?

The Ministry of Transportation in Ontario, Canada, advises that riders who need help should “… place your helmet on the ground near the road.” (Another good reason to wear a helmet, even if it’s not required.) One of the more common hand gestures, used in some locations, is for the passing rider to give a thumbs-up signal, to which the stranded rider would return a thumbs down gesture if help is needed or a thumbs-up if it’s not needed. The stranded rider can also try to get help by waving emphatically. I remember doing this once and the passing motorist just gave a friendly wave back. Of course, most of us would simply pull over and ask if they need help—not too complicated.

What do you do if a rider is stranded? As indicated earlier, we live in a riskier world than our forefathers. Here are several questions to consider:

  • Do I have the tools and expertise to help someone repair their motorcycle?
  • Is it too risky to stop after dark to offer help? Should I offer it only during daylight hours?
  • If a group of riders is stopped, how much can I really add to fixing any problem?
  • Is it safe to stop and offer help to strangers on the road?
  • Does the situation feel OK or do I sense that something isn’t right?
  • Should a single female rider ever stop to help a male rider(s)?

There aren’t any easy, universal answers to these questions. Each rider has to assess the particular circumstances of each situation. My personal experience has shown, though, that riders are often likely to offer help to other riders because of the overarching camaraderie and goodwill among motorcyclists. Do You stop for a stranded rider?

Michael Theodore
National Road Captain

SIGN,SIGN,EVERYWHERE A SIGN

dsc03533 Left-Curve-Side-Road-Sign-X-W1-10L Right-Curve-Side-Road-Sign-X-W1-10R


SIGN,SIGN,EVERYWHERE A SIGN
On any Given Ride, we are presented with countless road signs along the way, each strategically placed to guide and warn us of potential danger. Are there particular signs that suggest more of a threat than others? I believe there are. Consider the commonly seen signs I have posted here. Each represent a routine curve to either the left or right. Each also indicates a junction with a side road at some point mid-corner. Although, at face value, neither sign appears to suggest a higher priority over the other, one distinction presents higher risk to the rider. Of course, all intersections deserve our full attention. But knowing that traffic crossing or entering our lane is the leading cause of multi-vehicle crashes, a curve with a junction to the right is of particular importance, especially if that curve has an obstructed view like your behind a car. Assume an advancing left-turning driver (who would also have a limited view of our approach) will be crossing our path as we appear. By making this sign a high priority, we can anticipate the turning car before we even enter the corner, and then take necessary precautions to avoid a mid-corner conflict.
The best position a rider should be in when approaching that  blind left curve with a road to the right when behind a car. Is to position your bike to the outside of the blind curve. Meaning position the bike to the outside far right of  your lane. This position increases your line of sight and provides the most advanced visual warning possible. Now start slowing your approach to the corner leaving some space behind the car in front of you. So you can stop if need be or make a quick adjustment. But don’t let the car in front of you get to far a head. This would invite the turning car right into your lane and path.
Don’t over look signs
MICHAEL THEODORE
NATIONAL ROAD CAPTIAN

COLD WEATHER RIDERS How To Tackle Winter Like A Pro

winter riding

COLD WEATHER RIDERS
How To Tackle Winter Like A Pro
WINTER RIDING TIPS
Colder months bring their own challenges for motorcyclists. With a little bit of planning and a positive attitude, you can make it through to the warm rays and blue skies of spring. Here are some tips to help you prepare for winter.
WINTERIZING YOUR BIKE
Sometimes, Old Man Winter—and holiday travel obligations—simply can’t be beat, and you have to put your bike away for a month or three or four. A few simple steps can help ensure your motorcycle will be ready to ride when it’s time.
First, if at all possible, store the bike inside a garage. It’s amazing how much damage can be done by exposure to the elements, even in a few months.
But before you put it away, take a little time to check the following:
Gas: Top off the tank and add the recommended amount of a fuel stabilizer. This additive will keep your gas from breaking down and leaving a gunky brown “varnish” on the inside of your carburetors (assuming your bike still has carbs). Then start the engine and run it for several minutes to make sure you get the treated gas distributed throughout the fuel system.
Oil: Oil starts out golden and clean, and winds up black and dirty. This is bad. The contaminants in the oil can be corrosive, and you don’t want your engine parts sitting in a corrosive bath all winter. So do yourself a favor and change your oil just before the bike goes into storage.
Coolant: Because most motorcycles don’t get a lot of use in sub-freezing temperatures, many riders overlook the importance of checking their coolant for protection against winter freeze-up. Use one of those floating-ball testers to make sure your coolant will resist freezing in the temperatures you experience. If you need to add any, make sure you use the type of coolant recommended by your manufacturer.
Battery: Some modern motorcycles can put a slight drain on a battery to run a clock, maintain radio presets or operate an alarm system. If you’re in this situation, make sure you have a charger system in place to keep your battery alive. Otherwise, at least make sure it starts the winter with a full charge, and give it a recharge every month or so. I keep My bike on a battery manager all year when not in use I simply plug it in.
Other stuff: Some will insist you should store your bike with the tires off the ground. This is a great idea—if you can arrange it. If not, inflate both tires properly, put the bike on its center stand, if your bike has one and every week or so spin the front tire to avoid flat spots. Also, a good coating of wax will help preserve your paint and chrome, and a breathable cloth cover can keep off dirt and dust.
Do it right, and all you’ll have to do come spring is turn the key, press the starter button and begin racking up the miles again.
ANY WEATHER, ANY TIME
While cold temperatures and cloudy skies can try to put a damper on your riding, there’s a lot to be said for experiencing the changing landscapes of fall and winter on two wheels. While I don’t advocate riding in truly treacherous conditions (ice and snow, for example), with some commonsense, you can stretch your riding season out considerably, even if you live in the northern United States. I love to ride in the winter. I just make sure there is no ice out on the roads before I head out. I do not ride at night though in the winter months only during the day.
Unlike summer, when you can just throw on the same jacket, gloves and helmet any morning, autumn and winter temperature swings mean you need to think before you ride.
In many parts of the country, it’s not uncommon to see temperature swings of 20 degrees or more from morning to afternoon. That may not matter much when the high and low are 80 and 60, but it can make an enormous difference in your comfort level when the numbers involved are, say, 40 and 20. With the chilling effect of air flowing past at 65 mph, the perceived difference to exposed skin can be 20 to 30 degrees or more.
Here’s a simple, three-step program to help dull the sting of those colder temperatures.
STEP 1: PRESERVE BODY HEAT
Remember the last time you were at an overcrowded event? Remember how hot it got? That’s a real-world example of one important fact: The human body is a pretty good source of heat. So as the temperature drops, your first priority should be to preserve as much of that heat as possible. Here are a few tips:
Think layers: What keeps you warm it isn’t just the material in the clothes you wear. It’s also the air trapped inside. That’s one reason why a few lighter layers are better than one heavy one for fall riding. Plus, layered clothing allows you to fine-tune your comfort level by adding or subtracting a layer in variable autumn temperatures.
Build a base: The stuff you wear right next to your skin is called a base layer, and it can be incredibly important in staying warm. Old-school cotton provides warmth, but if you sweat, it’ll stay damp, and you’ll get chilled. Synthetics like polyester wick away perspiration to give you more consistent warmth, and they adapt better when the temperature goes up. Looking for an unconventional choice? Some well-traveled motorcyclists swear by silk long underwear for its combination of warmth and comfort.
Get fleeced: Remember when you were a kid and your mom dressed you in so many layers of winter clothes you could hardly move? It didn’t work for throwing snowballs then, and it won’t work for operating a motorcycle today. What you need is a light insulating layer that fits comfortably inside your riding jacket. Consider an inflatable vest, which makes maximum use of the insulating properties of trapped air. Best of all, you can adjust the level of insulation by adding or subtracting air through an inflation tube.
Adapt to conditions: Lots of riding jackets offer liners you can zip in when the weather gets chilly. Some are just thermal vests, which can leave your arms unprotected from the cold, while others have an entire inner jacket for maximum warmth. Remember, though, that this is likely to be the layer you’ll want to shed first when the sun gets high in the sky. So plan space to carry it on the bike.
Get dressed inside: If it’s chilly in your garage or the parking lot of your hotel, be sure to put most of your gear on indoors. There’s a fine balance here—you want to retain the indoor heat, but you don’t want to seal everything up and start sweating. You might want to zip that last zipper just as you’re headed out the door.
Have a glove strategy: Some riders carry as many as four pairs of gloves on a cold-weather ride, with heavy gloves, lighter gloves, glove liners and rain gloves. There’s good reason to take this element seriously: Your hands are the most important interface between you and your bike. When they get cold, your ability to operate your bike safely is compromised.
Cover your head: If it works for ninjas, it can work for you. We’re talking, of course, about wearing a balaclava—a thin head-and-face covering that allows only your eyes to show. Sure, you look funny. But you’ll be warmer. You can find balaclava’s in motorcycle shops or outdoor stores. Just make sure the one you buy is thin enough so you can still get your lid on.
Wear a full-face helmet: It may seem obvious, but a full-face helmet can keep you much warmer than an open-face lid. The trade-off is that you risk fogging your face shield, so keep it cracked while moving, and be ready to open it wide when you stop.

dress for winter

STEP 2: BLOCK THE WIND
You can be wearing all the layers in the world, but if they don’t prevent the wind from getting in, sooner or later, you’ll get cold. So consider these strategies for fending off wind.
Stop it cold: Make sure your outermost layer is windproof. Leather is pretty good at this, and so are some high-tech fabrics, but you probably already have an effective wind-block layer in your tank bag—your rain suit. No, it doesn’t add warmth, but it can be remarkably effective in keeping the chill out.
Watch where clothing overlaps: When the wind is blowing at 65 mph, it will find its way through any cracks in your cold-weather armor. Take the time to pull your gloves completely over your jacket sleeves and clinch them down tight. At the waist, “weave” upper and lower layers over each other—pants over base-layer top, fleece pullover over pants, rain suit pants over fleece pullover, jacket over rain suit pants, etc.—to keep the wind at bay. Finally, make sure there’s no gap between your pants and boots.
Don’t stick your neck out: When it comes to heat loss, one of the most vulnerable areas is your neck. Even a simple bandana can help, but there are products made specifically to protect this area.
Don’t forget the bike: You don’t have to wear all your wind protection. A fairing, even a small one, can make a tremendous difference in cooler weather. In addition, many dual-sport bikes and adventure-tourers come with hand guards that serve as mini-fairing’s for your hands. Don’t have a fairing? A well-packed tank bag can be almost as effective in blunting the wind.
heat
STEP 3: ADD HEAT
Few things in life beat the sense of well-being that comes from riding down the road on a chilly day all toasty warm. You can get that feeling with electric clothing.
What’s especially nice is that most electric garments offer some level of insulation when they’re turned off, too, meaning they’re perfect for variable fall weather.
Here’s what’s out there:
Going electric: In the beginning, electric clothing for motorcyclists meant vests. That’s still a good starting point, because if you can keep your body’s core well-heated, your extremities should stay warmer, too. These days, though, they have come a long way for motorcycle riders. Now you can choose from electric jackets, liners, pants, chaps, gloves’s and socks. If your alternator is up to the challenge of powering them, those pieces can generate enough heat for extended forays in sub-freezing temperatures.
Hand warmers: Like other electric clothing, heated gloves turn your bike’s generating system into protective warmth. Here, though, it’s more than just comfort at stake. Warm fingers handle the throttle, brake and clutch more safely than stiff, frozen digits. Plus, electric gloves can often be thinner than their fully insulated counterparts, making for better control feel.
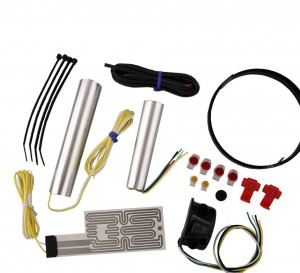
Hot bikes: Instead of wearing your heated gear, you can outfit your bike with electrics. Heated handgrips come standard on some models, and they’re available as options on some other bikes. Some companies sell do-it-yourself kits to warm up the grips on almost any machine. Want to get your heat from another direction? Try a heated seat, available as a factory option  for a variety of bikes. There are aftermarket company’s out there with a heated seat for almost every bike. On my Ultra Limited I have heated grips along with my heated seat and passenger seat and backrest. I use my full heated gear jacket liner,gloves,pants and socks when I ride in the winter months. And this has made one huge difference in why I ride and can stay out all day long riding in the cold months.
Hope these tips helped you out some remember if you do ride in the winter months slow it down some ride safe.
Michael Theodore
National Road Captain


Touring Tip: Five Common Sources of Motorcycle Accidents & Strategies For Avoiding Them

IMG_0800-772x515

Defensive Riding Techniques –

  1. ONCOMING, LEFT TURNING VEHICLE: This is probably the most common cause of motorcycle accidents. The driver of an oncoming vehicle doesn’t see a motorcyclist and makes a quick left turn directly in the rider’s path, leaving little or no time to avoid hitting the car.
    -Avoidance Strategy: First, it’s always helpful for riders and their bikes to be as conspicuous as possible, which is helped by auxiliary lights ride with your high beam on and high visibility riding gear. Second, look for indications that the oncoming driver may not see you: no eye contact, hands turning the steering wheel, or movement of left front wheel or just plain out on their phone. Third, ride at a safe speed in traffic congested areas, because higher speed equals longer stopping distances. Some riders, however, slow to a crawl when they see a left turning vehicle, but this is an invitation for that driver to turn in front of you! I always move to the farthest part left in my lane makes me a little more visible and gives me more room in case I need to make a fast move. I always have eye contact on that driver. And it is also a great time to use your horn let them know you are there.
  2. ANIMALS IN THE ROAD: I’ve personally experienced running into and over some ground hogs to other rodents in the road. Besides an owl and Vulture. I have the scratch marks on my helmet from that big Vulture. And it doesn’t necessarily take a large critter to take a two-wheeler down.
    -Avoidance Strategy: Constantly scan the road and surrounding terrain ahead for animals, particularly when undergrowth and trees are close to the pavement. Also, those “deer warning signs” are usually present for a reason. Be especially alert when riding in the early morning or evening, when animals are the most active. Adjust your speed and cover clutch and brake levers in high-risk areas so emergency stopping distances are appropriate for those conditions. And, of course, it never hurts to periodically practice emergency stops and swerves in a parking lot.
  3. GRAVEL ON BLIND CURVES: Riding through gravel with the bike leaned over at speed is almost certain to result in a crash. The situation worsens if the sliding motorcycle and rider cross the yellow line into the path of an oncoming vehicle—crunch!
    -Avoidance Strategy: Gravel on roadways is more likely after heavy rains, near construction sites, and at gravel driveways in rural areas. If riders assume there will be gravel around a blind curve, they are more likely to adjust their entry speed accordingly. It’s also possible to use some light braking in a curve, even with the bike leaned over, especially if the motorcycle has anti lock brakes. But the best technique is usually to avoid the gravel, stand the bike up, and apply maximum braking. Maximizing sight lines is also an important strategy for avoiding all types of hazards on blind curves.
  4. CARS CHANGING LANES: At on ramps or while riding on crowded multi-lane urban roads, an adjacent motorist may suddenly pull directly into your path, leaving little or no time for evasive action.
    -Avoidance Strategy: Rule number one is to stay out of the blind spots of other drivers. It’s also important to maximize the space cushion between the rider and other vehicles. Rush hour traffic on multi-lane highways presents the highest risk for other vehicles changing lanes into a rider. If riding at this time can’t be avoided, I’ve found the best strategy is riding in the far left lane so traffic on only the right side must be monitored.
  5. EXCESSIVE SPEED IN A CURVE: A rider suddenly realizes mid-curve that the turn is tighter than expected ( a decreasing radius curve) and panics. Instead of increasing the bike’s lean angle, the rider stops looking through the curve, stiffens his or her arms, and goes straight off the roadway. This often results in the motorcyclist crashing into a stationary object (guardrail, tree, building, etc.) or flying off their bike or road.
    -Avoidance Strategy: Pay attention to that little voice in your head when it says, “I’m riding above my skill level.” Of course, the easiest way to avoid crashing on a curve is to do what’s taught in the basic MSF course: slow the bike before entering a curve and accelerate out of it. Even a highly skilled rider always should keep some of his bike’s lean angle in reserve in case it’s needed. Remember it is ok to scrap you pegs/running boards.

Safe riding practices help motorcyclists avoid accidents and bodily injury, and they also build rider confidence and enjoyment.

Michael Theodore

National Road Captain


Adjusting Your Riding Style

17d0a17c-9115-4c51-98bb-61f63563c8a3

Dragon slaying 1

B-e1379012053645

Adjusting Your Riding Style

When changing the style of motorcycle you are riding, what is the most important adjustment to make? Should your riding style change?
A rider needs to make adjustments anytime he or she straddles an unfamiliar motorcycle, even for one in the same category.
The adjustments relate to such factors as the bike’s riding position (seat height and relationship between seat, footrests, and handlebars),dimensional characteristics (weight,wheelbase,steering head angle, center of gravity, tire size and tire profile), responsiveness of controls (throttle,clutch friction zone and brake pressure), and power – to – weight ratio.
Sport bikes are at one end of the spectrum, with lighter weight, shorter wheelbases, steering head angles closer to vertical, and quicker – revving engines, and they generally provide higher levels of responsiveness to throttle, brake, and handlebar input. This means you may need to be softer with your inputs until you have accumulated some miles manipulating the controls.
Safety tip: While in neutral, get a feel for how much throttle twist is needed to raise engine speed.
Comfort tip: Avoid supporting all your weight on your wrists and engage your core abdominal and back muscles instead. Keep your head and eyes up to help fight fatigue and improve visual assessment of the riding environment.
Larger cruiser models are at the other end of the spectrum, due to their heavier weight, longer wheelbases, steering head angles farther from vertical, and slower revving engines. They typically provide greater straight – line stability with more steering effort required for directional changes.
Safety tip: Consider the turning radius for slow. tight turns and U – turns.
Giving you an extra free tip here. Learning how to feather your clutch on any bike you will then be able to do any slow tight turn with ease.
Comfort tip: You might need time to get accustomed to the leaned – back, feet forward, arms – raised position.
Adventure – type bikes are fairly close to their standard/naked cousins in terms of riding style, but with your knees more forward and your mid – section closer to the fuel tank. This position brings your elbows up for quicker control and helps when transferring weight to the footrests in counter – weighted turns in the dirt or on tight roads.
Bottom line: Take your time to become familiar with a different bike. You want your control operation to be solid so you and your bike can bond for a safe, comfortable time together.
Michael Theodore
National Road Captain


HOW TO TOW ANOTHER MOTORCYCLE SAFELY

Towline-Method-1-590x393 Towline-Method-2-590x393


Towline-Method-2-590x393

HOW TO TOW ANOTHER MOTORCYCLE SAFELY


 Have you ever had your Motorcycle break down while you were out on a ride by yourself or riding with your friends? Or maybe you just once ran out of gas a couple of miles before a fuel stop? Well if you carry a tow rope with you on your bike there will be no more walking the bike or sitting on the side of the road waiting on someone.

First, get 12 feet to 20 feet (4 to 6 m) of rope, tie-downs hooked together, a bit of fence wire or phone cable, or best of all, a one inch (2.5 cm) wide flat nylon strap. I prefer the nylon strap.

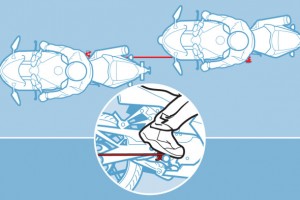
One method in towing a bike will keep the towline down low. On the lead bike, wrap the line once around the right foot peg (if the drive chain/belt is on the left). The rider firmly holds the line in place with his foot. The rider being towed does the same thing using the opposite foot peg. If the tow goes wrong, either rider can easily let go.

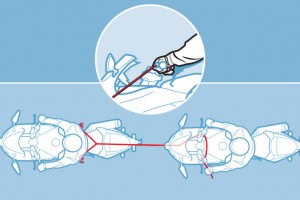
Another method  starts with the line tied to the frame of the lead bike as high as possible. Alternately, make a “Y” in the end of the line and tie each end to a foot peg; the fork should rest in the center of the seat above. The end leads back to the trailing bike, and goes under the headlight, on the centerline of the bike. The loose end wraps around the handlebar once or twice, and is held by the left (clutch) hand. The towing rider operates the front brake normally, and if he needs to get free, he can simply let go.

Either way, the more experienced rider should be on the trailing bike, and should keep all the slack out of the line; because the trailing rider can easily run over a slack line and get it caught up in the front wheel if you do not keep the slack out of the line. All braking should be done by the trailing rider, and the lead rider should keep the speed down.

Michael Theodore
National Road Captain